
Vue List/Detail App
What is it?
JavaScript frameworks and libraries provide the structure for making web apps in the JavaScript environment. There are many different types of JavaScript frameworks/libraries, but learning the basics of one will help you understand the ecosystem.
Why should I learn it?
The web development environment now includes these frameworks and libraries. It is important to understand the role they play in creating interactive web applications.
What can I do with it?
You can create interfaces and interactives that run on the web. You can take advantage of templating features that prevent duplication of effort.
How long will it take?
Learning advanced web development is a lengthy process. These tutorials will take several weeks to go through to explain the basic functionality available for interactive web development. But with time and practice, you can master the skills necessary to create functional applications.
Resources
- Glitch examples for you to Remix
- LinkedIn Learning - Learning Vue.js
- Vue.js Website
JavaScript Frameworks - Vue.js
There are several JavaScript frameworks/libraries that help you get started making a web application. They provide pre-written, standardized JavaScript code and other tools that developers use to simplify routine tasks and create interactivity on the web. We will be using Vue, but here are a few that are commonly used:
- Vue.js- JavaScript framework that helps developers build user interfaces for web applications and websites. It's designed to be simple, flexible, and easy to integrate with other libraries and projects. It was developed by Evan You, formerly of Google. It has been available since 2014. The current version is Vue3, and we will be using that version for these exercises. Be aware that future versions may change syntax associated with these exercises.
- React - open-source front-end JavaScript library for building user interfaces based on components. Available since 2011, it originated at Facebook and is maintained by Meta and a community of developers. Sites like Paypal, Netflix, AirBnB and Facebook have been developed using React.
- Other JS Frameworks include Angular, Svelte and Node.js.
- Many implementations of frameworks/libraries require the use of Node Package Managers (npm) to install the framework on your computer. But some basic functionality is able to be achieved using cloud-based links. This is the method we will use in these tutorials.
List/Detail Application
In this exercise, we are going to make an interactive application that contains a list of items, with image and descrption, that allows the user to select an item and see a more detailed view. This is how many apps and websites are designed, including email programs, Yelp, catalog sites like Amazon, etc. We are going to use a JSON (JavaScript Object Notation) dataset to populate the information in the app. This allows the content to be updated in the dataset, thus updating the app.
Start with a new folder, create a basic index.html page that has general page structure and links to both vue.js and vue-router.js, as we did in the Interactive Website tutorial. Find the dataset and include it in your html code within the body. This dataset includes name, description, neighborhood, address and an image reference. The images will need to be made available in the folder of your app.
We'll be using data about Austin restaurants and food trucks. This is indicated in the data set that is established in JavaScript Object Notation (JSON) format. The code sample provides various properties for the restaurants, including name, neighborhood, description, address and an image reference. But feel free to adjust the dataset with your own information and make changes later in the code.
Set up the basic HTML page structure, with "app" div and a script section.
Include the data in the html file in a script area.
App Structure
The app will be displayed in the div with the id of "app". In order to see images with the Image command, you will need to put the images in the folder with your html file and refer to them with the name in the dataset (rest1, rest2, etc or use the names of your files in the dataset). You can find images associated with the restaurants in my data in this folder. To create the app's structure, we create the Restaurant const that identifies the varialbes and creates the HTML format for the app. The items in curly braces will be filled in from the dataset.
Below the Restaurant const, include the new Vue declaration.
Put the sampe code for the Restaurant const in the script area below the dataset.
List View
Next we create the Restaurant List const to populate the app with data from the dataset. Put the sample code below the Restaurant const in the script section. Note that the v-for attribute loops through the dataset to identify each variable. The component connects it to the Restaurant const above. We created variable for all items in the dataset. The new Vue command sets the main element as the "app" div.
Once you put in the RestaurantList, routes and router consts and new Vue declaration, you can run the app. It should work, but the format is not desirable. Find the sampe code for some styles that will improve the layout of the app. It provides overall formatting for the restaurant class, as well as the image and name. Of course, you can add and modify the CSS to your liking.
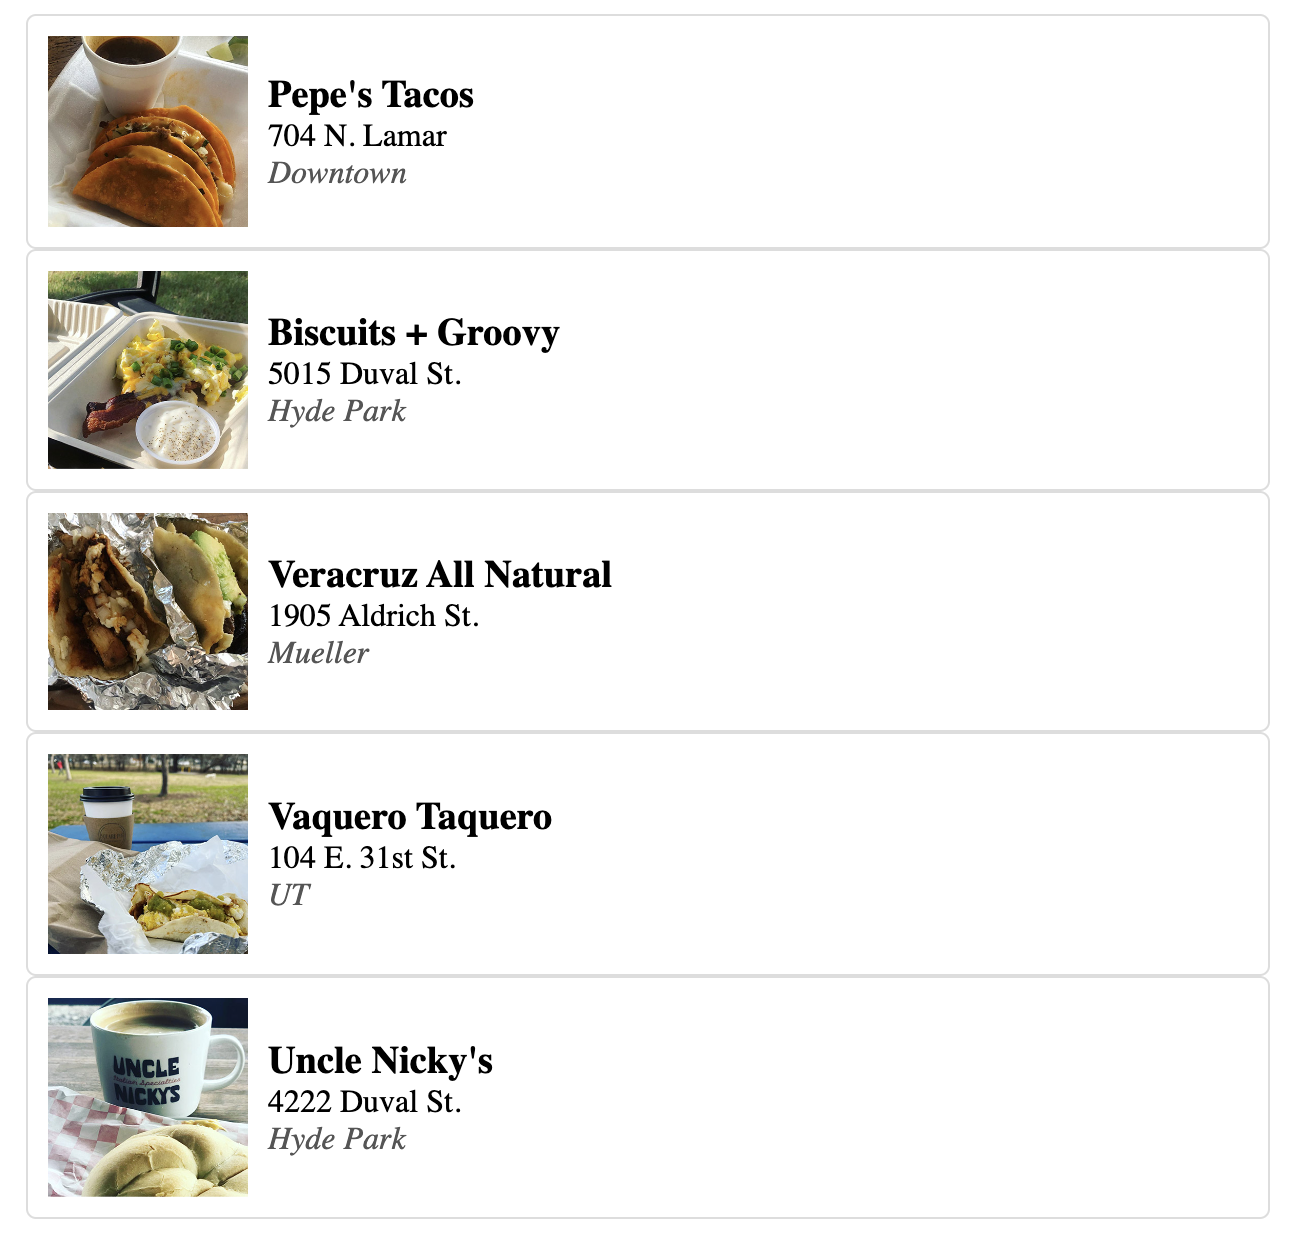
Your app should look something like this:
Place this code below the Restaurant const in the script area. Includes both head and sitedesc in divs at top of app.
Place this code below the RestaurantList const in the script area. These are commands that run the Vue app. Notice the small tick marks surrounding the template area. This handles the concatenation for multiple items in a template. The tick mark is the item below the tilde to the left side of the keyboard.
Include the css in a style section in the head.
Detail View
Now we want to provide links to go to more information about the selected item. First we need to modify the Restaurant const to include the router-link around image and name. Modify the Restaurant const to look like the code sample.
Next we want to add the RestaurantDetail const that creates the template for the Detail page for each item. It also includes a link to go back to the List. Then we need to add statements that control the router that makes the links. A set of styles for the detail class are provided, but you can style this any way you want.
Test your app and see if it works. Apply any other classes in the html and style sections to control the layout and responsiveness of the Detail page in the RestaurantDetail template. Consider how you would add another variable to your dataset and include it in the app. For example, what if there was a restaurantType variable that included the type of food, i.e. Italian, Mexican, Pizza, Vegetarian, etc.
Think about how you would add additional features to the app. For example, how might you filter on neighborhood or other variable, so the user could narrow their choices.
The detail view of your app should look something like this.
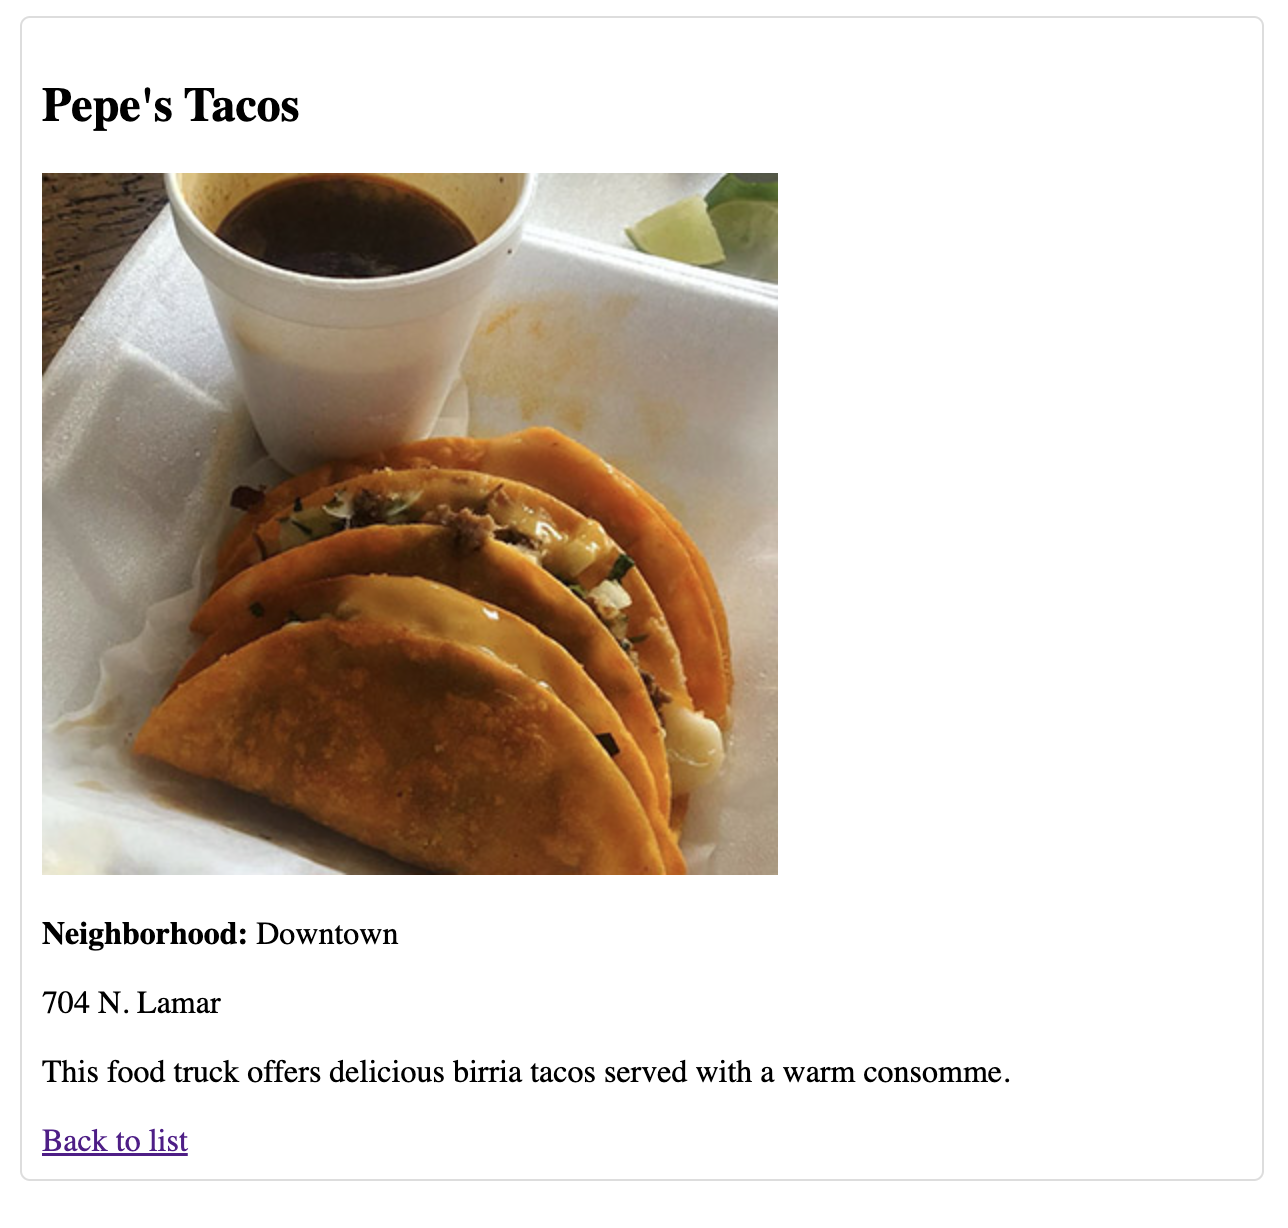
You should be able to navigate back to the list and click on each item.
Restaurant const modified to add router link for image and name in the "restaurant" class.
Code for RestaurantDetail. Place below RestaurantList const in script. As above, notice the small tick marks surrounding the template area. This handles the concatenation for multiple items in a template. The tick mark is the item below the tilde to the left side of the keyboard.
Modify the routes const below RestaurantDetail for router references to RestaurantDetail.
Include a new style in the style section for the detail class.
Making a Progressive Web App
We can give the web application more of the characteristics of a native app by turning it into a Progressive Web App (PWA). A PWA can function offline, receive push notifications, and access device features while still being accessible through a web browser on any device with a single codebase. You just have to add a few files, some scripts and create icons to convert.
Basic Application Code
For this example, I have made the code more generic than the Restaurant example above, so you can see how to modify and customize it for your topic. This includes the names of functions and classes in the code and references to images in the dataset. I have also removed the CSS, so you can identify the classes in the template and provide the appropriate responsive design CSS to design your app. See the first code sample. Copy and paste into a code editor and make sure you save it in a new folder with the name index.html. The name index.html will be referenced in the PWA files, so it is very important that you name the file index.html.
Take a careful look at each section of the Vue code. Focus on the html templates in the AppTemplate and App Detail functions. The Vue application reads the data from the dataset and uses a loop to present it on the List page. It creates a link to the name and image to go to the respective detail page.
Modifying CSS
I have included my sample CSS for the related classes and ids. As you work with the CSS, you can make any changes you want to create a responsively designed app.
Adding the Progessive Web App Files
Next, we will create two files, service-worker.js and manifest.json. See the code samples. The service-worker.js file indicates the files used in the application, so that it can be accessed offline. Make sure your filenames are listed properly.
The manifest.json file acts as a configuration file that provides information about the app to the browser, expressing how the PWA should appear and behave when installed on a user's device, including details like name, icons, theme colors, and launch URL, allowing it to look and function more like a native app. Notice how this file is set up like a dataset with several properties and values in a json (JavaScript Object Notation) format.
Make Application Icons
You will need to make icons that will be used on the devices that a referenced in manifest.json. Create icon-192x192.png (exactly square, 192px) and icon-512x512.png (exactly square, 512px) and make sure those are saved in the folder with your other files. Web guidelines suggest you create both sizes, but only one will be used on the device (depending on which browser is accessing it).
Additional iPhone Code
There are some additional lines of code that should be included in the head to make sure the PWA functions properly on iPhone. See the code sample.
Hosting the Progressive Web App
You will need to host the app on https on your website to see that these files are registered and working properly. Once you upload all files to a subdomain that supports https, you can Inspect, Application to see if that the files are recognized. Then you can access the app in the browser on the device. Try turning off wifi to test offline capabilities. And try using it on an iPhone with the Safari browser. Choose the Share icon, Add to Home Screen, to see it install on the device with your icon.
If you made and corrected errors with the procedure above, you might need to clear cache on your iPhone to get it to recognize the icon. Go to Settings, Apps, Safari and Clear History and Website Data.
Generic code sample of Vue application. You can add your own data and add CSS to control the layout.
Code for service-worker.js
Code for manifest.json
Code in index.html to use service-worker.js and manifest.json. Include in head below the Vue cdn scripts but above the style section.
Finally, for the PWA to work properly on iPhone, include the following in the head below the original meta line.
API Example
We created our own API (Application Programming Interface) above, where we created a JSON dataset with our restaurants in it. But there are existing datasets online that could also be used in a project like this. The UnSplash API has a series of photos with related information. You can tap into that API, by going to the UnSplash Developer site and creating an account. After you create an account, you will be able to make a New Application (give it a name that meets requirements). Then you will get your API Access Key that you can try in this example. It provides a list of photos served from the UnSplash API (queried on "food" in url string), and each photo links to a detail page with more information about the photo from the API.
Of course, you can adjust the styling as desired and even use Bootstrap, if you need more complex layouts using the grid. As above, think about how you would add additional features to the app. For example, how might you filter on one of the variables, so the user could narrow their choices.
You should be able to navigate back to the list and click on each item.
Code for UnSplash API example. Use your API key in the example where indicated.
Moving On
Great job! You have learned how to use Vue.js to create an interactive web app with List and Detail Views that incorporates text and images, and pulls from a dataset, as well as an API. Consider how you would use these techniques for other projects.